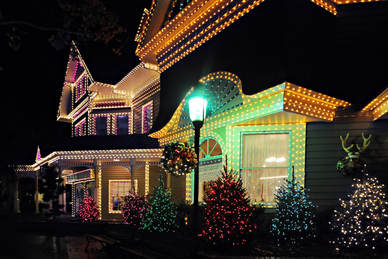
It’s that time of year again. Christmas is fast approaching and if hanging Christmas lights is on your agenda, learning from the professionals is a smart way to start. It goes without saying, hanging Christmas lights can be a dangerous job. Getting on ladders and roofs does not come without some risk. Being prepared, using the right equipment, and having a plan will make installing Christmas lights easier, faster, and safer.
PLANNING
1. Measurements
Professional light installers always measure before they start. How else can you determine the amount of lights needed or how many lengths of string lights are needed? Measure the base of the house, going along any turns and corners. Don’t forget to measure doors and door frames, window frames, and any other surface to be lit. Consider studying the roofline, gutters, and shingles. Take note of gutters to make sure they are not loose. There are specific clips for each of these surfaces. Install hooks and hangers beforehand, if possible.
2. Power Sources
Locate where your power sources will be. Your power source should come from a ground fault circuit interrupter (GFCI) outlet because it will shut the circuit down if there is an over-current. If you don’t have a GFCI outlet, a portable outdoor unit can be purchased from your local home store for less than $20, or a qualified electrician can install a GFCI outlet outdoors.
New homes are usually built with outdoor plugs, however, older homes may need to use extension cords. It’s a good idea to run your outdoor extension cords ahead of time to save time. Make sure your extension cords are rated for outdoor use and keep them out of high traffic areas. Lighting professions will calculate power wattage to keep from overloading a circuit or blowing a fuse. To do this, multiply the wattage of the bulb by the number of sockets to get total wattage of a string light, then divide the total watts by 120 to reach total amps. Circuits should not exceed 80% of their max wattage capacity.
3. Light Testing
Checking your lights before it’s time to hang them. There are inexpensive light testers available. This will enable you to have time to either make repairs or buy new or replacement lights. Buy waterproof or water-resistant lights marked with a tag from underwriters lab (UL). Make sure the lights you buy are rated for outdoor use. Try to use shorter rather than longer light strings so that it can be replaced more easily.
Mini-lights use miniature bulbs and are the most popular because they are inexpensive and cost less to run. Larger C-9s and C-7s can become hot and consume more energy. However, they are more heavy-duty and if one bulb is broken or missing, the rest of the string will continue to work, unlike the mini-lights. LED Christmas lights are more expensive than the other lights, they burn cooler, use less electricity and last longer. The light strings which are easiest to use have a male plug at one and and a female receptacle at the other.
4. Materials
Use a stepladder if the eaves of your home are low; otherwise use an extension ladder. The ladder should be firmly placed on flat ground, extended well beyond the eaves, and leaned at an angle that is safe and easy to climb. Use plastic clips made for hanging lights along gutters and eaves. Use rope light clips or adhesive or nail-on plastic string light clips spaced about 12 inches apart to hang window trim lights. Staples or nails should not be used because they can pierce or wear away the protective insulation.
You can set your lights to come on and go off with Christmas light timers and controllers. Make sure that these are rated to be used outdoors.
Harper Roofing offers a free professional roof inspection at your convenience and will give you an honest assessment of your roof’s condition. Follow us on Facebook>!
Harper Roofing hopes that you have found this information helpful and informative. Most of all, be safe when installing your outdoor Christmas lights. We are here for all your roofing needs. We wish you a joyous Holiday Season!
